Easy DIY Hair Bow Organizer: Tame the Tangle
Simple Hair Bow Organizer solutions are a lifesaver for any busy household! Are you tired of the morning scramble, digging through drawers or baskets only to find a tangled mess of ribbons and clips? Does your vanity or closet often look like a hair accessory explosion? I know mine did! Imagine instead a beautiful, clutter-free display where every single bow is neatly arranged, easily visible, and ready to go. This kind of organized bliss can be yours in under an hour for around $20! In this article, I’ll show you exactly how to create your own simple hair bow organizer, transforming that everyday chaos into a chic and functional masterpiece that will bring a smile to your face every time you reach for a bow.
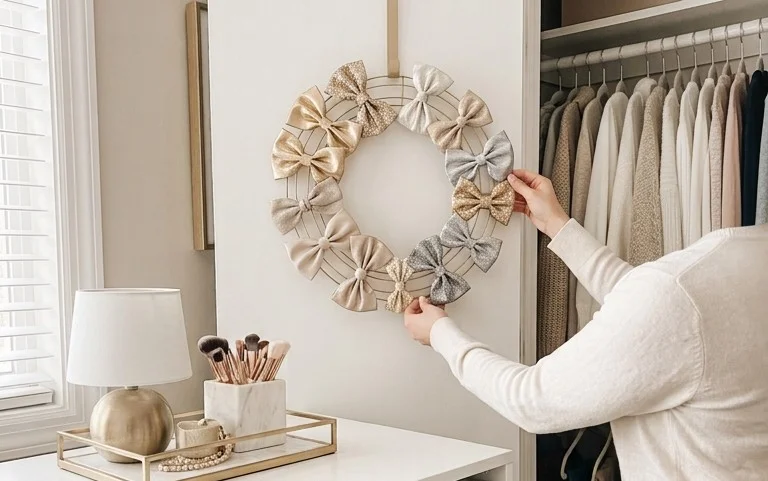
Tame the Tangle: Your Simple DIY Hair Bow Organizer
Is your little one’s collection of hair bows threatening to take over their dresser? Or perhaps you’re tired of the endless rummaging through a drawer, desperately searching for that perfect clip? I’ve been there! My daughter’s hair accessory hoard grew so quickly, it felt like a miniature explosion of ribbons and glitter. But thankfully, I discovered a wonderfully simple and incredibly effective way to organize it all without breaking the bank or needing advanced DIY skills. This project is perfect for anyone looking to bring a little order to their home, and it’s surprisingly customizable. Let’s dive in!
What You’ll Need and How Much it Costs
The beauty of this project lies in its simplicity and affordability. You probably already have some of these items around the house, and the rest are readily available at your local craft store, dollar store, or even online retailers.
* **A Base:** The most common and effective base is a piece of sturdy fabric. I recommend a felt or a thick canvas. You’ll need a piece roughly 18 inches wide by 24 inches tall. This gives you ample space to attach various hanging elements.
* *Rough Cost:* $5 – $10 for a yard of fabric. Look for sales or clearance sections!
* **Ribbon or Twill Tape:** This will be the primary way you attach your bows. You’ll need about 5-6 yards of ribbon or twill tape, preferably in a complementary color to your fabric base. Consider satin ribbons for a touch of elegance or sturdy twill tape for a more casual look.
* *Rough Cost:* $3 – $8 for a few spools of ribbon/tape.
* **A Hanging Mechanism:**
* **For Drilling:** If you’re comfortable drilling, two small eye hooks and a length of twine or wire (about 2 feet) will work perfectly for hanging on a wall.
* **For Rentals/No Drilling:** Two large command hooks (the heavy-duty kind that can hold several pounds) are an excellent alternative. You can also sew loops of ribbon onto the back of your fabric to hang on existing nails or hooks.
* *Rough Cost (Eye Hooks & Twine):* $2 – $5
* *Rough Cost (Command Hooks):* $6 – $12 for a pack of two.
* **Optional Embellishments:** This is where you can get creative!
* **Buttons:** About 10-15 decorative buttons.
* **Small Pompoms:** A small bag of assorted colors.
* **Scraps of Lace or Fabric:** For added texture.
* *Rough Cost:* $1 – $5, depending on your choices.
* **Tools:**
* Scissors
* A ruler or measuring tape
* Fabric glue or a sewing machine (if you prefer sewing)
* A hot glue gun and glue sticks (if using a hot glue gun for fabric glue)
* A needle and thread (if sewing any elements by hand)
* *Rough Cost:* Most people have these already. If not, a basic sewing kit is around $10, and a hot glue gun is about $15.
**Total Estimated Cost:** Between $15 and $40, depending on your choices and what you already own. This is a fantastic value for a fully functional and attractive organizer!
Measuring and Planning Before You Start
Before you cut a single piece of fabric or ribbon, a little planning goes a long way.
1. **Assess Your Bow Collection:** Take a look at the bows you need to organize. How many do you have? What are their sizes? Are they mostly large bows, small clips, or a mix? This will help you determine how many rows of ribbon you need and how much space to leave between them.
2. **Measure Your Space:** Where will this organizer live? Will it hang on the back of a closet door, on a bedroom wall, or in a small nook? Measure the available space. For a typical door, the 18×24 inch fabric base is a good starting point. If you have a very narrow space, you might need to adjust the width.
3. **Visualize the Layout:** Imagine your fabric base. I like to divide mine into horizontal sections for different types of bows. For instance, the top section might be for larger, clip-on bows, and the lower sections for smaller, ribbon-based bows. This helps with spacing your ribbons.
4. **Spacing the Ribbons:** For my 24-inch tall fabric, I usually divide it into 4 sections. This means spacing my ribbons about 6 inches apart, with a little extra space at the top and bottom. You want enough room for the bows to hang without getting tangled.
A Clear Walkthrough of the Process
Let’s get creating! This is designed to be a beginner-friendly project.
1. **Prepare Your Fabric Base:** If your fabric is new, give it a quick wash and iron to remove any wrinkles. If you’re using a wider piece of fabric, measure and cut it to your desired dimensions (e.g., 18 inches wide by 24 inches tall). You can leave the edges raw for a rustic look, or fold and hem them for a cleaner finish using fabric glue or a sewing machine.
2. **Mark Your Ribbon Placement:** Lay your fabric flat. Using your ruler or measuring tape and a light pencil or chalk, lightly mark where you want to attach each row of ribbon. For my 24-inch fabric, I’ll mark lines at 6 inches, 12 inches, and 18 inches from the top edge.
3. **Attach the Ribbons:**
* **Using Fabric Glue/Hot Glue:** Cut your ribbon to the width of your fabric base, plus about an inch on each side for overlap. Apply a generous bead of fabric glue or hot glue along your marked lines on the fabric. Carefully press the ribbon onto the glue, ensuring it’s taut but not so tight that it puckers the fabric. Fold the excess ribbon over the edges and secure it with more glue.
* **Using Sewing Machine:** Cut your ribbon to the width of your fabric base. Pin the ribbon along your marked lines. Stitch along both long edges of the ribbon, securing it to the fabric. Again, fold the excess ribbon over the edges and stitch them down for a clean finish.
* **Hand Sewing:** This is also an option if you don’t have a sewing machine. It will take a little longer but yields a beautiful result.
4. **Add Decorative Touches (Optional):** Now for the fun part! You can hot glue or hand-sew buttons, pompoms, or lace scraps onto the fabric between the ribbon rows. This adds personality and visual interest. I like to create little clusters of color or texture.
5. **Attach the Hanging Mechanism:**
* **For Drilling:** At the top of your fabric, about 2-3 inches from each side, screw in your eye hooks. Thread your twine or wire through the eye hooks and tie securely, leaving a loop for hanging.
* **For No Drilling:** Clean the surface where you’ll hang your organizer thoroughly. Following the instructions on the package, firmly press your command hooks onto the wall or door. Wait the recommended time before hanging your organizer. Alternatively, sew sturdy loops of ribbon to the back of your fabric base at the top corners, and hang these loops on existing hooks or nails.
6. **Hang and Admire!** Once your organizer is securely hung, it’s ready for its debut.
Adapting for a Small Space or a Rental
Don’t have a lot of wall space or can’t make holes? No problem!
* **Over-the-Door Organizer:** This design is perfect for hanging on the back of a closet door or a bedroom door. Use command hooks on the door itself, or sew loops onto the top of your fabric organizer to hang over the top of the door.
* **Wall-Mounted (No Drilling):** As mentioned, command hooks are your best friend here. Choose the heavy-duty variety that can handle the weight of your bows. Ensure the wall surface is clean and smooth for optimal adhesion.
* **Cylinder or Rod Organizer:** If you have a narrow space, consider a long, thin fabric strip hung vertically. You could even attach ribbons to a decorative wooden dowel or a smooth branch and hang that.
* **Drawer Dividers:** If you have limited wall space, this organizer can also be adapted to lie flat inside a deep drawer, with ribbons sewn onto it to create compartments. You’d then use this as a tray organizer within your drawer.
Styling Notes: Making it Look Good
An organized space should also be a beautiful space!
* **Color Palette:** Coordinate the colors of your fabric, ribbons, and embellishments with your room’s decor. If your room is soft and pastel, opt for muted tones. For a more vibrant space, go for brighter colors.
* **Texture Play:** Mix textures! A smooth satin ribbon against a textured felt base, with the fuzzy softness of pompoms, creates visual interest and a tactile experience.
* **Strategic Placement:** Don’t just shove bows anywhere! Think about how you want it to look.
* **Larger Bows/Clips:** Place these on the top rows where they are easily accessible and less likely to get crushed.
* **Smaller Bows/Hairbands:** The lower rows are perfect for these. You can loop smaller ribbon bows directly onto the ribbons.
* **Elastics/Bobby Pins:** While this is primarily for bows, you can also get creative. Small snap pouches or fabric pockets sewn onto the bottom could hold elastics and bobby pins.
* **The “Empty Space” Rule:** Don’t overstuff it immediately. Leave some visual breathing room. This makes the organizer look more intentional and less cluttered. As you add bows, try to distribute them evenly.
Keeping it Tidy After Week One
The initial surge of organization is easy. The real win is maintaining it.
* **The “One In, One Out” Rule (for new purchases):** If you buy a new bow, try to remove an old one or find a designated spot for it. This prevents the collection from growing unchecked.
* **Daily Tidy-Up (2 Minutes!):** Before bed, take two minutes to look at your organizer. Are any bows hanging crooked? Are there any strays? Quickly adjust them. This small habit prevents small messes from becoming big ones.
* **Weekly Bow Audit:** Once a week, perhaps on a Saturday morning, take a slightly closer look. Are there any bows that haven’t been worn in months? Consider donating them. Are any ribbons getting a little frayed? Gently trim them.
* **Designated “Temporary” Spot:** Have a small decorative box or tray nearby for bows that are temporarily out of play (e.g., taken off for a bath). This prevents them from ending up on the floor or dresser.
Mistakes That Make This Fail
Even the simplest projects can have pitfalls. Here are common mistakes to avoid:
* **Using Flimsy Fabric:** If your fabric is too thin, it will sag and wrinkle, making the organizer look messy and reducing its lifespan. Opt for felt, thick canvas, or even a sturdy quilting cotton.
* **Ribbons Too Loose or Too Tight:** If the ribbons are too loose, bows will slide around and get tangled. If they are too tight, they can pucker the fabric and look unprofessional. Aim for a snug, but not strained, tension.
* **Ignoring Weight Distribution:** Don’t put all your heaviest bows on one side or one section. Distribute them evenly to prevent the organizer from tilting or pulling away from the wall.
* **Overcrowding from the Start:** Trying to cram every single bow you own onto the organizer immediately can make it look chaotic from day one. Start with your most frequently used bows and add more as needed.
* **Not Securing Hanging Mechanisms Properly:** Whether you’re drilling or using command hooks, ensure they are installed correctly and are rated for the weight. A falling organizer is a disorganized organizer!
* **Neglecting Maintenance:** The biggest reason any organization system fails is a lack of ongoing upkeep. Even a simple daily or weekly touch-up makes a huge difference.
Creating this simple hair bow organizer has brought so much joy and order to my daughter’s room, and I’m confident it will do the same for yours. It’s a small project with a big impact, proving that beautiful organization doesn’t need to be complicated or expensive. Happy organizing!
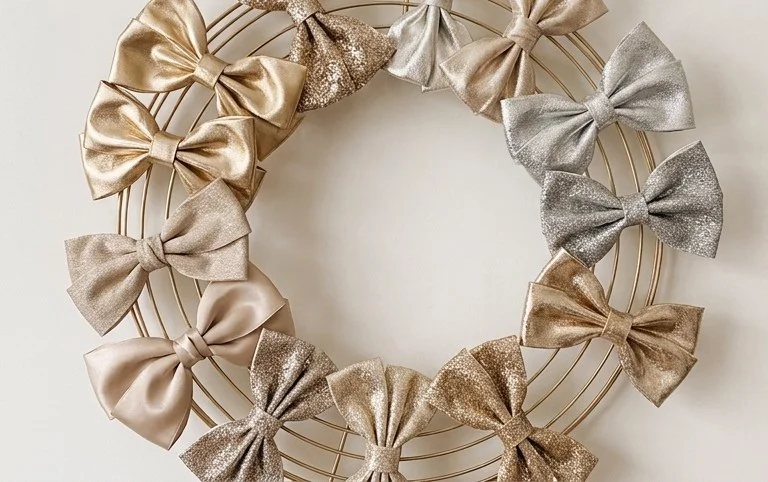
Conclusion
Finally, a tidy solution to that hair bow chaos! This simple hair bow organizer isn’t just about aesthetics; it brings a little peace and order to your mornings. Imagine effortlessly finding the perfect bow without a frantic search – it truly makes a difference in your day-to-day routine. Ready to reclaim your space? Your smallest first step could be as simple as dedicating a drawer or a small section of a shelf. For a different vibe, consider a decorative basket for the bathroom or a minimalist wall-mounted rack for a teen’s room. There are countless ways to bring organization and style to your home. Keep exploring, and happy decorating!
