Easy Terracotta Pumpkin DIY Decor Ideas
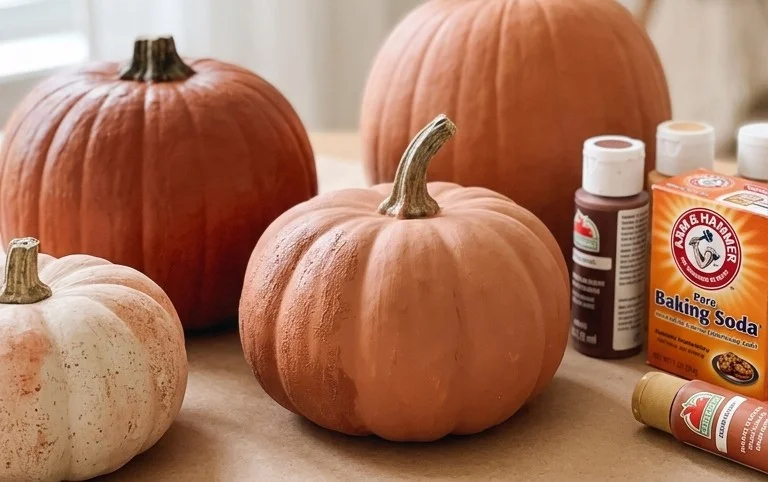
Terracotta Pumpkin DIY is about to become your favorite way to add cozy, autumnal charm to your home! Are you tired of clutter and wishing your seasonal decor felt a little more sophisticated and less… *plastic*? I know I have been! Imagine a mantelpiece adorned with these beautifully textured, earthy pumpkins, adding a warm glow and a touch of rustic elegance to your living space. This project is surprisingly affordable, costing only a few dollars for materials, and can be completed in under an hour. In this tutorial, I’ll show you exactly how to transform simple craft store finds into these stunning decorative pieces, so you can create a cohesive and inviting fall ambiance without breaking the bank or spending hours on complicated crafts.
Bring on the Autumn Charm: Your Terracotta Pumpkin DIY Tutorial
As the leaves begin to turn and a crispness enters the air, my home always craves a touch of autumnal warmth. And this year, I’ve fallen head over heels for the understated elegance of terracotta pumpkins. They possess a rustic, earthy vibe that’s incredibly sophisticated, far from the garish orange gourds of yesteryear. The best part? They’re surprisingly simple and budget-friendly to create yourself! Forget expensive store-bought decorations; with a few basic supplies and a little bit of crafting time, you can fill your home with these charming accents.
What You’ll Need and Roughly What It Costs
Gathering your materials is part of the fun! For a collection of around 5-7 medium-sized terracotta pumpkins, here’s what I typically procure:
* **Terracotta Pots:** This is your base! You’ll want a variety of sizes for visual interest. For a good mix, I usually grab a few 6-inch diameter pots (around $3-$5 each) and a couple of 4-inch diameter pots (around $2-$4 each). If you’re feeling ambitious, a smaller 2-inch pot can make a cute little stem ($1-$2). Total for pots: Approximately $20-$35.
* **Terracotta Saucers:** These are perfect for creating the ribbed texture of the pumpkin. You’ll need one saucer for each pot, ideally one size larger than the pot opening. So, for a 6-inch pot, a 7-inch saucer ($2-$4 each). For a 4-inch pot, a 5-inch saucer ($1-$3 each). Total for saucers: Approximately $15-$30.
* **Paint:** I opt for acrylic paints. For a classic terracotta look, you’ll need a warm, earthy terracotta orange. I also like to have a creamy off-white or ivory for the stems and maybe a touch of a muted green or brown for accents. A couple of 2oz bottles of each color should be plenty ($3-$5 per bottle). Total for paint: Approximately $10-$20.
* **Paint Brushes:** A few assorted sizes are ideal – a medium flat brush for the main pumpkin body, a smaller round brush for details and stems, and maybe a stiff-bristled brush for texture if you’re feeling adventurous. A set of 3-5 brushes can be found for $5-$10.
* **Craft Glue or Hot Glue Gun:** For adhering the saucer to the pot. A hot glue gun with a few glue sticks is my preferred method for its speed and strength ($15-$25 for a basic gun and sticks). Craft glue is a cheaper alternative if you have patience ($5-$10).
* **Scissors or Craft Knife:** For trimming and shaping your saucer.
* **Optional: Mod Podge or Sealer:** If you want to add a matte finish and a bit of protection, especially if they’ll be in a high-traffic area. A small jar costs around $5-$8.
* **Optional: Twigs or Small Branches:** For a more natural stem. You can find these on a walk outdoors!
Rough total cost for a good-sized collection: $55 – $93. This is a fantastic value for creating a custom autumn decor set that will last for years!
Measuring and Planning Before You Start
Before you dive into painting, take a moment to plan your pumpkin collection. Think about where you want to display them. Are they for a mantelpiece, a bookshelf, or a coffee table?
* **Size Matters:** Lay out your terracotta pots and saucers. How do they look together? Do you want a tall, slender pumpkin (pot with a slightly smaller saucer) or a short, non-alcoholic stout one (pot with a wider saucer)? Consider the scale of your display area. A large mantel might accommodate several larger pumpkins, while a small entryway table might only have room for one or two smaller ones.
* **Saucer to Pot Ratio:** For that classic pumpkin shape, the saucer needs to be wider than the opening of the pot. If it’s too close in size, you’ll get a less pronounced curve. If it’s significantly larger, it can look a bit top-heavy. Aim for the saucer to extend about 1-3 inches beyond the pot’s rim. You can always trim excess saucer material later.
* **Stem Style:** Decide if you want to use the saucer as the stem base, or if you plan to add a natural twig. If you’re using a smaller terracotta pot as a stem, think about how it will attach to the saucer.
This planning stage ensures you’re not just randomly crafting, but creating a cohesive set that will look intentional and beautiful in your home.
Your Step-by-Step Terracotta Pumpkin DIY Tutorial
Here’s how I bring these beauties to life:
1. **Prepare Your Saucers:** This is where the magic happens for the pumpkin shape. For each terracotta saucer, I flip it over so the indented side is facing up. This indented curve will form the top of your pumpkin. If the saucer is significantly larger than your pot opening, you’ll need to trim it. I usually use scissors or a craft knife to carefully cut away excess material, aiming for a shape that will nicely hug the rim of the pot. Don’t worry about perfection here; a slightly uneven edge can add to the charm.
2. **Paint the Pumpkin Body:** Take your terracotta pot (the body of the pumpkin) and paint it with your chosen terracotta orange color. I usually do two coats to ensure a nice, even coverage and to deepen the color. Let each coat dry completely before applying the next.
3. **Paint the Saucer (Stem Base):** While the pot dries, paint the saucer. I usually paint the inside of the saucer (which will be the top of the pumpkin) with the same terracotta orange. The rim of the saucer and the bottom (which will be the stem base) can be painted with the ivory/off-white color. Again, two coats are usually best.
4. **Attach the Saucer:** Once both the pot and the saucer are thoroughly dry, it’s time to bring them together. Apply a generous amount of craft glue or hot glue to the rim of the terracotta pot. Carefully center the painted saucer over the opening of the pot, pressing down firmly to secure it. If you’re using hot glue, this will set quickly. For craft glue, you’ll need to hold it in place for a minute or two and then let it cure completely, which might take several hours.
5. **Create the Stem:** Now for the stem! If you’re using the painted rim of the saucer as your stem, you can simply touch up any areas that need it. If you want a more defined stem, I like to glue a small, decorative terracotta pot (inverted) onto the center of the saucer. For an even more natural look, find a dried twig or small branch, trim it to size, and glue it into the center of the saucer. You can also paint this stem with your ivory or brown paint.
6. **Add Details (Optional):** Once everything is dry, you can add some subtle details. Using a fine brush and a slightly darker shade of orange or brown, I sometimes add a few very faint lines to mimic the natural segmentation of a pumpkin. You can also add a touch of white highlight to the top of the stem for a bit of dimension.
7. **Seal (Optional):** If you’ve used Mod Podge or a clear acrylic sealer, apply a thin coat over the entire pumpkin and let it dry. This will give it a nice matte finish and protect the paint.
Styling Notes: Color, Texture, and Placement
Now for the fun part – arranging your new terracotta treasures!
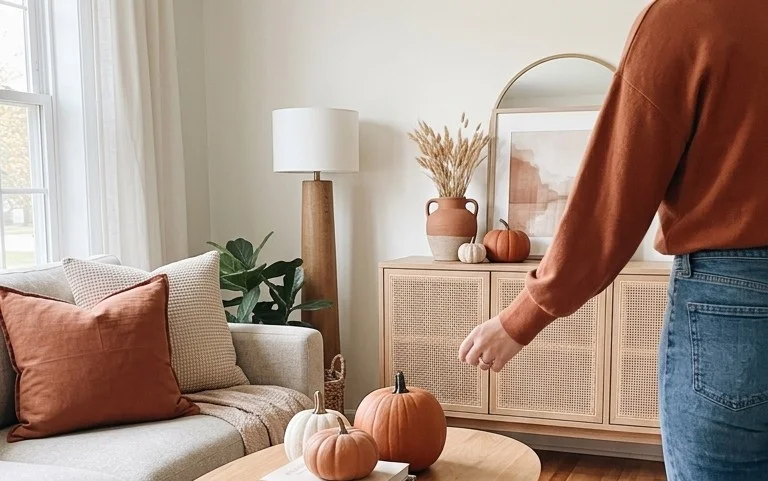
* **Color Palette:** Terracotta is wonderfully versatile. It pairs beautifully with other autumnal shades like deep greens, creamy whites, warm browns, and even subtle blush tones. Don’t be afraid to mix and match your terracotta pumpkins with natural elements like real or faux leaves, pinecones, and wood accents.
* **Texture Play:** The unglazed texture of the terracotta itself adds so much character. Combine your smooth painted pumpkins with rougher textures like burlap, woven baskets, or chunky knit blankets for a cozy, layered look.
* **Placement is Key:**
* **Mantelpiece Magic:** Group a few pumpkins of varying sizes along your mantel. You can place them at different heights for visual interest, perhaps leaning a larger one against the wall.
* **Bookshelf Bliss:** Tuck a small pumpkin or two onto your bookshelves, nestled between books or perched on top of a stack.
* **Coffee Table Charm:** A cluster of 3-5 pumpkins can make a stunning centerpiece for your coffee table. Arrange them asymmetrically.
* **Entryway Welcome:** Place a single, larger pumpkin on your entryway console table to greet guests with autumnal warmth.
* **Kitchen Counter Curator:** A couple of smaller pumpkins can add a touch of seasonal cheer to your kitchen counters or windowsill.
When arranging, think about creating vignettes. Don’t just line them up. Use asymmetry, vary heights, and let them interact with their surroundings.
Keeping It Tidy After Week One
The beauty of these DIY terracotta pumpkins is their low maintenance.
* **Dusting is Your Friend:** A soft cloth or a feather duster is usually all you need. Gently wipe down your pumpkins weekly to keep them looking their best.
* **Spot Cleaning:** If you happen to get a smudge or spill, gently dab it with a slightly damp cloth. Avoid harsh scrubbing, which could damage the paint.
* **Indoor Living:** These are primarily for indoor decoration. While acrylic paint is durable, prolonged exposure to moisture or direct sunlight can eventually degrade the finish.
Mistakes That Make This DIY Fail
Even with a simple project, a few common pitfalls can arise. Here’s what to watch out for:
* **Impatience with Drying Times:** This is the number one culprit for a messy finish. If you try to paint over wet paint or glue pieces together before they are fully dry, you’ll end up with smudges, drips, and weak adhesion. Let each step dry completely!
* **Saucer Size Miscalculation:** If your saucer is too small, you won’t get that characteristic pumpkin curve. If it’s too large, it can look unbalanced. Take a moment to hold them up together before you commit to gluing.
* **Over-Complicating the Stem:** Sometimes, less is more. Trying to create an overly elaborate stem can detract from the simple charm of the pumpkin. A well-placed twig or even just the painted saucer rim can be perfect.
* **Skipping the Planning Stage:** Just grabbing pots and saucers and starting to paint without a clear idea of the final look can lead to a collection that feels disjointed. A little planning goes a long way.
* **Using the Wrong Glue:** For a strong bond, especially with terracotta, hot glue or a good craft glue is essential. A weak glue will result in your saucer detaching, which is a rather sad pumpkin fate.
With these tips and a little bit of creativity, you’ll have a beautiful, personalized collection of terracotta pumpkins that will bring warmth and autumnal joy to your home for seasons to come. Happy crafting!
Conclusion
Adding a touch of handmade charm to your home, like these delightful terracotta pumpkins, truly makes a difference in your everyday environment. They bring a warm, inviting glow that subtly elevates your space. Don’t let this inspiration fade! Your smallest first step today could be as simple as gathering a few basic craft supplies. For a different vibe, consider a terracotta painted vase for your living room, or perhaps mini painted terracotta succulents for a budget-friendly kitchen accent. We hope this terracotta pumpkin DIY has sparked your creativity. Explore more ideas to continue making your home uniquely yours!